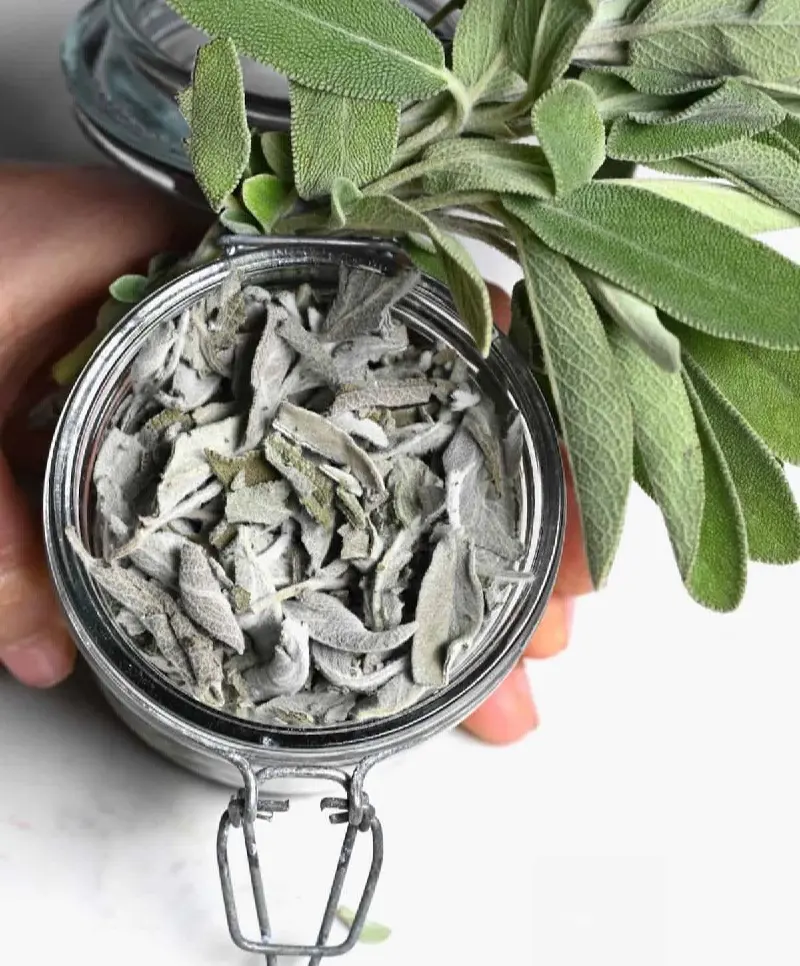
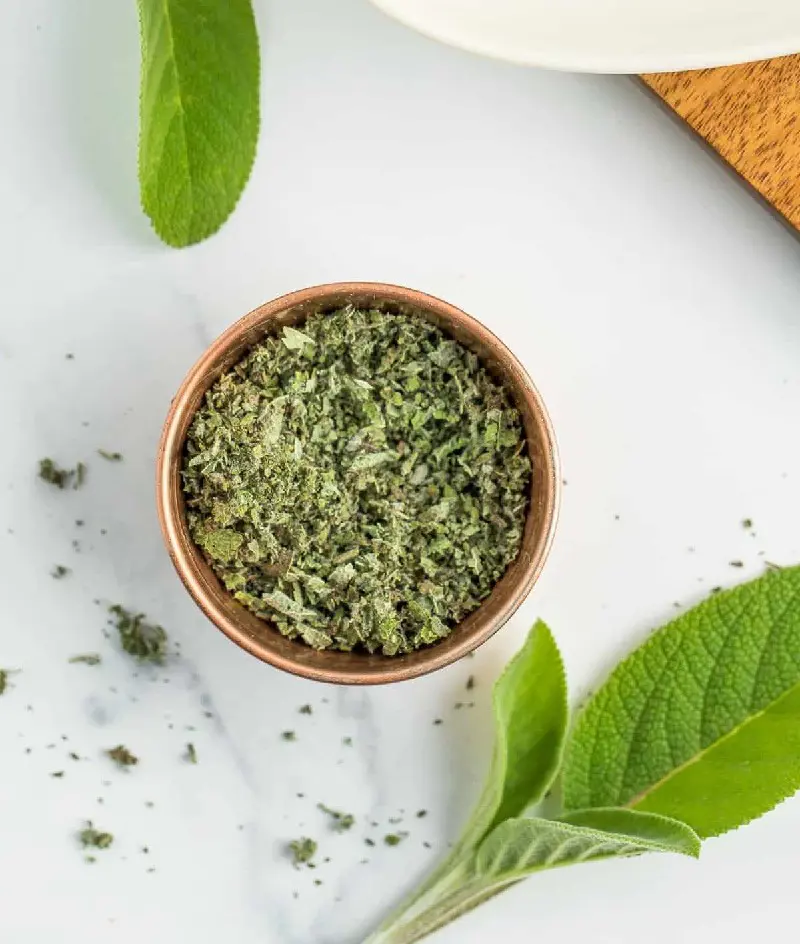
Dried sage is a pantry staple in many homes. The herb is well-loved for lasting far longer than fresh sage, spicy aroma, and earthy taste. It can be used as a rub for meat dishes, seasoning for roasted root vegetables, and in creamy pasta sauces.
If you have a surplus of the herb in your garden and want to dry it at home for use in delicious recipes, there are several super easy ways to dry sage. Here is everything you need to know on how to dry sage.
1. Air-drying
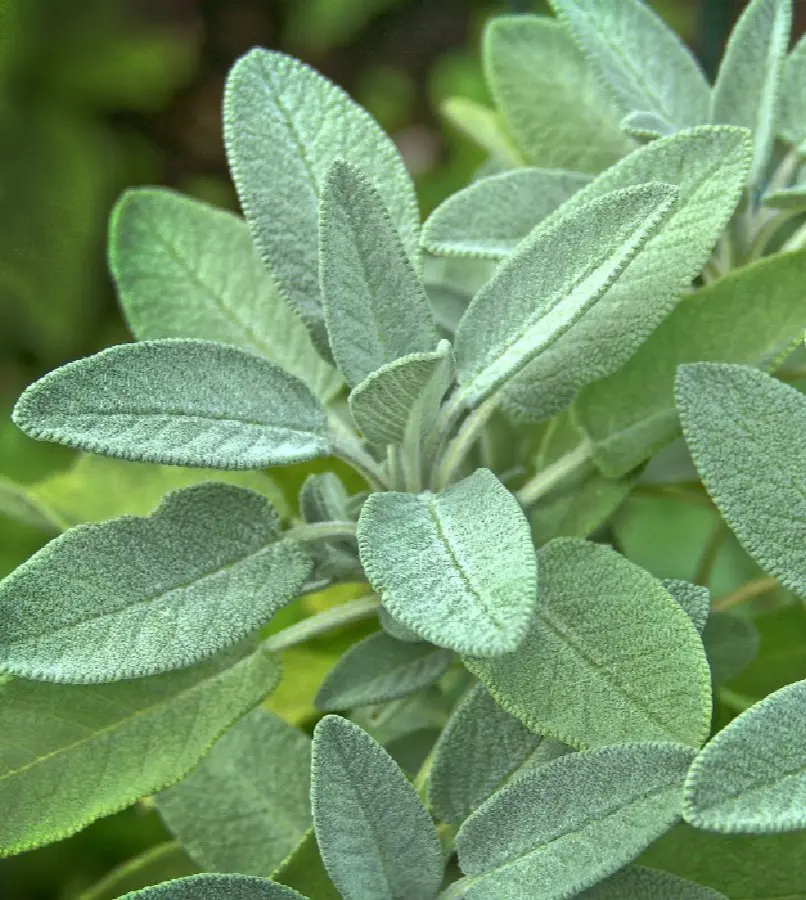
Air-drying sage is one way to preserve its flavor and medicinal properties. Start by harvesting fresh sage sprigs. Select healthy, mature leaves and cut sprigs with long stems. Secure the sprigs into small bundles with a string or rubber band.
Hang these bundles upside down in a dry, well-ventilated, dark place such as an attic, pantry, or a shaded porch. Check the bundles periodically to ensure they are drying evenly. After about 1-2 weeks, the sage should be completely dry, feeling crisp and brittle.
2. Oven Drying
For oven-drying sage, preheat your oven to around 180°F (82°C). As the oven heats, prepare the sage by spreading the leaves in a single layer on a baking sheet lined with parchment paper. Once the oven is ready, place the baking sheet inside, leaving the door slightly ajar.
This small opening prevents the sage from steaming. Check the sage every 15 minutes, turning the leaves to ensure even drying. The process can take 30 minutes to 2 hours, depending on the sage. The sage is ready when the leaves are dry and crumbly.
3. Microwave Drying
Oven drying can be time-consuming and requires regular monitoring. If you want to avoid this hassle, microwave drying is another option. Microwave drying uses high-intensity radiation to remove moisture from sage leaves rapidly. Spread the sage leaves in a single layer between two paper towels.
Place the leaves on a microwave-safe plate and set your microwave to high. Microwave for 1 to 2 minutes and check the leaves. If they are not crisp, continue microwaving in 30-second intervals. Avoid burning them by monitoring them closely.
4. Dehydrator
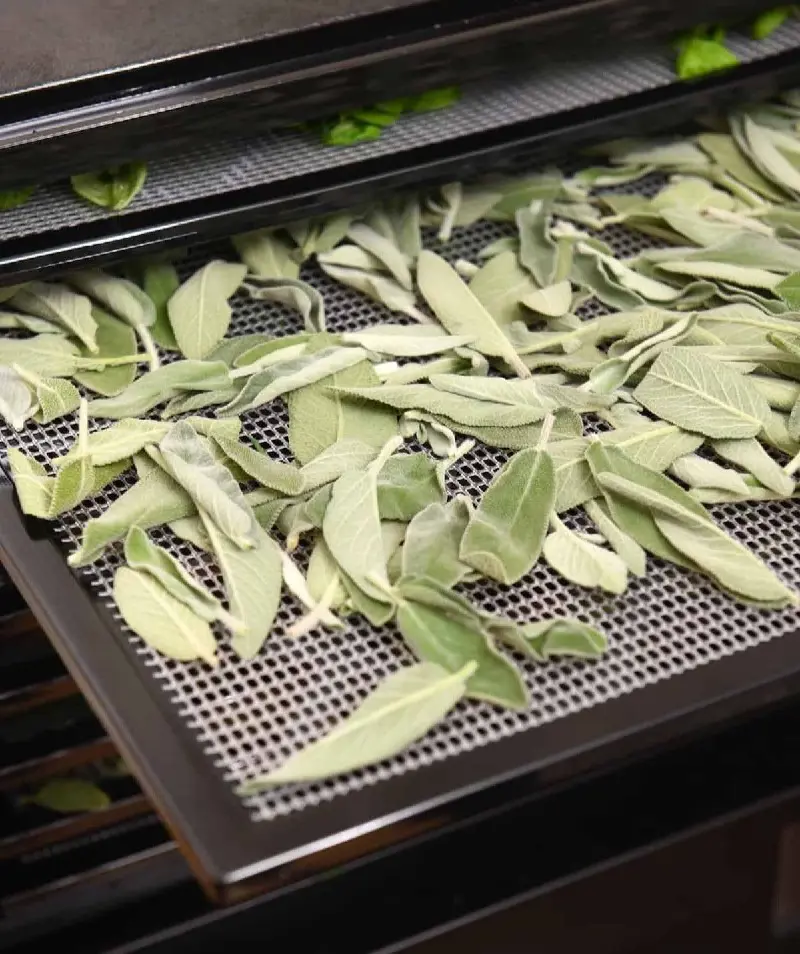
Dehydrator drying is ideal when you have a dehydrator with adjustable temperature settings. Arrange the sage leaves in a single layer on the dehydrator trays to allow even airflow. Set the dehydrator to a temperature range of 95°F-115°F (35°C-46°C), ideal for drying herbs.
This temperature range prevents the loss of essential oils and flavor. Let the dehydrator run for 1-4 hours, depending on the thickness of the sage and the humidity level. Check regularly, and once the sage leaves are crisp and crumble easily, they are ready.
5. Using a Fan
You can use a fan if you prefer not to use heat to dry sage leaves. This method retains more of the sage’s essential oils, as high temperatures can diminish their potency. Spread the sage leaves in a single layer on a cooling rack. Position the fan directly over the sage to accelerate the drying.
Depending on the humidity levels and air circulation, this will take 1-2 days. Regularly check the leaves and turn them to ensure even drying. This technique is ideal for drying small to medium batches of sage leaves quickly.
6. Sun Drying
Sun drying is suitable for warm, dry climates with high temperatures and low humidity. To sun dry sage, harvest fresh sprigs and gently rinse them. Pat the sage dry with a towel and spread the leaves in a single layer on a clean cloth or mesh screen.
Place the leaves in a well-ventilated location. Cover it with another cloth or mesh screen to protect the sage from insects and debris. Turn the leaves regularly to ensure even drying, and bring them indoors at night. The drying process will take 1-2 days.
7. Freezing
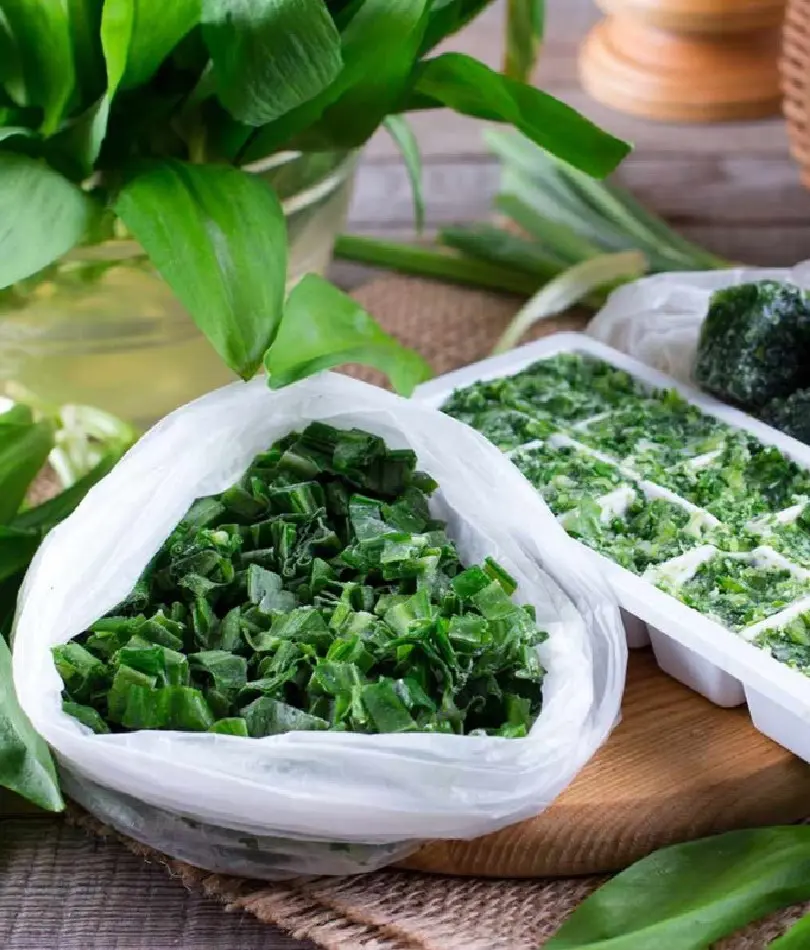
Freezing sage is ideal when you have a large harvest and want to avoid the potential loss of flavor associated with drying. Start by harvesting fresh leaves and laying them in a single layer on a baking sheet.
Place the baking sheet in the freezer and leave it until the leaves are frozen solid, which takes a few hours. Once frozen, transfer the sage leaves to a freezer-safe bag or airtight container, removing as much air as possible to prevent freezer burn. Label the container with the date and store it in the freezer.
8. Refrigerator Drying
Refrigerator drying removes moisture from the sage leaves over a few days without the use of extreme cold like freezing. This method is better for those who prefer a slower, more controlled drying process. For this method, harvest fresh sage leaves and spread them on a paper towel in a single layer.
Place the leaves in the refrigerator. After a few days, the leaves should be dry and crisp. The refrigerator dehydrates the leaves slowly without the risk of overheating or losing essential oils.
9. Paper Bag
To use this method, gather fresh, clean sage sprigs and gently pat them dry to remove moisture. Place the sage sprigs into a clean paper bag and close it with a string or clip. Poke a few small holes and hang it in the pantry or closet.
Over the next few weeks, shake the bag gently to ensure even drying. Once the leaves are crisp and dry, remove them from the bag and store them in an airtight container. This method is suitable in areas with fluctuating humidity levels.
10. Cloth Bag
In this method, you replace the paper bag with a cloth bag. The cloth bag allows for better airflow than paper bags, leading to a faster and more uniform drying. Prepare the sage leaves by harvesting and cleaning them. Place them inside the bag and close it.
Hang it in a well-ventilated area away from sunlight and moisture. Inspect the sage regularly to ensure it is drying properly. The leaves will dry after 1-2 weeks. After that, remove the sage and store it in an airtight container.
11. Radiator

Drying sage leaves on a radiator when it is in use during the cooler months is another method. Start by harvesting and rinsing fresh sage sprigs. Pat dry them with a cloth or paper towel. Spread the sage leaves in a single layer on a paper towel or clean cloth.
Place the sage leaves on the radiator that should be warm but not too hot to touch. Turn the leaves occasionally for even drying. It can take a few hours to a full day. The sage leaves are dried if they are crisp and crumble easily.
12. Herb Drying Rack
Using a herb drying rack is efficient when you have a large harvest. The racks maximize airflow around the herbs, ensuring even drying. This method is suitable if you have space to set up the rack in a well-ventilated area, away from direct sunlight.
For this method, spread the sage leaves evenly on each shelf. Place the rack in a location with good air circulation, and let the sage dry for 1-2 weeks. Check the leaves regularly for dryness and ensure there is no mold growth. Once the sage is dry and brittle, store it in an airtight container.
How Long Dried Sage Last?
Dried sage can maintain its flavor, aroma, and potency for about one to two years if kept in optimal conditions. Store the dried sage in an airtight container to protect it from moisture and air exposure to maximize its shelf life. Keep the container in a cool, dark place, away from direct sunlight and heat sources, which can cause the sage to degrade more quickly.
Additionally, avoid opening the container unnecessarily to minimize exposure to air and humidity. However, no matter how well you store dried sage, it is bound to lose some of its potency. If the sage has lost its fragrance or smells strange, replace it with a fresh batch.
How to Store Dried Sage
Proper storage is key to preserving dried sage's flavor and strength. To keep your dried sage at its best, follow these guidelines:
Cool the Sage
After drying, allow the sage to reach room temperature before transferring it to storage containers. To do this, spread the sage leaves on a clean, dry surface like a countertop or a large tray.
Ensure the surface is in a well-ventilated area to facilitate even cooling. Avoid placing the sage in a sealed container while it is still warm, as this can trap residual moisture and potentially lead to mold growth.
Use Airtight Containers
Using airtight containers prevents exposure to air, moisture, and contaminants. A glass, metal, or high-quality plastic container with a tight seal is ideal. Ensure the container is completely clean and dry before placing the dried sage inside.
Seal the container tightly, ensuring the lid or closure is secure. Regularly check the tightness of the seal so that the sage remains dry and aromatic.
Label and Date
Labeling and dating your dried sage helps create a reliable reference for freshness and potency. This practice keeps track of the duration of storage and ensures you use it within its optimal period.
If you dry multiple herbs or batches, labeling prevents confusion between less potent sage and fresher supplies. To label effectively, use a label maker to write the herb's name and the drying date on the container.
Keep in a Dark Place
Keeping dried sage in a dark place is crucial for preserving its flavor, color, and aromatic oils, as exposure to sunlight can accelerate the degradation of essential oils and lead to the loss of potency and flavor.
Therefore, to maintain its quality, store the dried sage in dark-colored containers that block light in a cupboard or pantry where light is minimal. Additionally, choose a storage location that has consistent, cool conditions to further protect the sage from deteriorating.
Avoid Frequent Opening
Avoid opening the container too often to keep your dried sage fresh and flavorful. Every time you open it, the sage is exposed to air and moisture, which can lead to the degradation of essential oils and flavor compounds.
To prevent this, only open the container when necessary, and use a clean, dry spoon to get what you need. Additionally, consider using a container with a spout or a small opening to protect the sage.

Use Desiccant Packs
Using desiccant packs with the dried sage in the container helps control moisture and extend the herb's shelf life. Desiccant packs contain silica gel that absorbs excess moisture from the air. This prevents mold growth and preserves the quality of the dried sage.
To use desiccant packs, place a small packet or two inside the airtight container with your dried sage. Ensure that the desiccant does not touch the sage itself. Some might need to be reactivated according to the manufacturer's instructions.
Benefits of Drying Sage
Drying sage offers several benefits:
Extended Shelf Life
Drying sage extends its shelf life by significantly reducing moisture content, which prevents mold and bacteria growth. Fresh sage lasts only a few days before wilting and spoiling, but once dried, it can be stored for up to one to two years.
This extended shelf life means you will have sage for culinary and medicinal use long after the growing season ends. Properly dried and stored sage remains flavorful and potent, making it a practical addition to your pantry.
Enhanced Flavor Concentration
Drying sage concentrates its essential oils, which enhances its flavor and aroma compared to fresh sage. The drying process reduces the moisture content and intensifies the herb’s flavor compounds, which gives it a distinctive taste and fragrance.
Dried sage is incredibly flavorful. A little goes a long way because its taste is so strong, meaning you can use less sage and still get a burst of flavor in your food.
Convenient Storage
Dried sage is more convenient to store than fresh sage because of the reduction in volume. Fresh sage takes up a lot of space and needs to be refrigerated, while dried sage can be kept in a small container in your pantry.
Dried sage frees up space for other ingredients, and you do not have to worry about it rotting quickly. It is also convenient to handle and measure.
Cost-Effective
Drying sage at home is a cost-effective strategy, as pre-dried sage can be expensive, especially if you use it frequently. By growing and drying your sage, you avoid the ongoing cost of buying it from stores. This process also allows you to control the quality and freshness of the herb, ensuring it meets your standards.
Additionally, drying sage at home means you can use it throughout the year, saving you money and reducing the need for frequent shopping trips. Overall, drying sage is a practical way to manage costs while taking advantage of your herb harvest.
Reduce Waste
Drying sage reduces waste by letting you make use of an abundant harvest or excess from your garden. Drying preserves the herb for future use instead of allowing fresh sage to spoil or go unused.
This process ensures you can fully utilize your plants, even in surplus, preventing unnecessary loss. This approach not only maximizes the value of your garden but also supports more sustainable practices.
Versatile
Dried sage is versatile and can be used as more than seasoning. It enhances dishes, making it a potent ingredient for soups, stews, and roasts.
It can be used in herbal teas to aid digestion or even turned into healing tinctures for medicinal purposes. Additionally, dried sage can be used in homemade sachets or potpourri for its aromatic qualities, adding a pleasant fragrance to your home.
Preservation of Medicinal Properties
Drying sage preserves its medicinal properties, so you can use it for medicinal purposes even when fresh sage is not available. Sage has anti-inflammatory, antimicrobial, and antioxidant properties that help with digestion, reduce inflammation, and boost immunity.
When you dry sage properly, these helpful qualities remain intact, allowing you to use it in teas, tinctures, and other remedies throughout the year. This means you can still enjoy its health benefits long after the fresh sage is gone.