Drying and storing corn properly are essential for preserving the quality and longevity of your harvest. The quality of corn is the highest at harvest and it degrades as each day passes unless you preserve it. If you have an abundant harvest, you should promptly dry the corn to maintain quality.
If you neglect to dry the corn, it can spoil due to mold, insects, or excessive moisture and result in wastage. This guide has all the steps in drying your corn and storing it safely to enjoy throughout the year.
1. Harvesting
Before drying, harvest your corn from the garden. To harvest corn, you should be able to tell if it is mature. Mature corns have dry and brown husks and plump and hard kernels. The kernels should not dent easily when you squeeze a few.
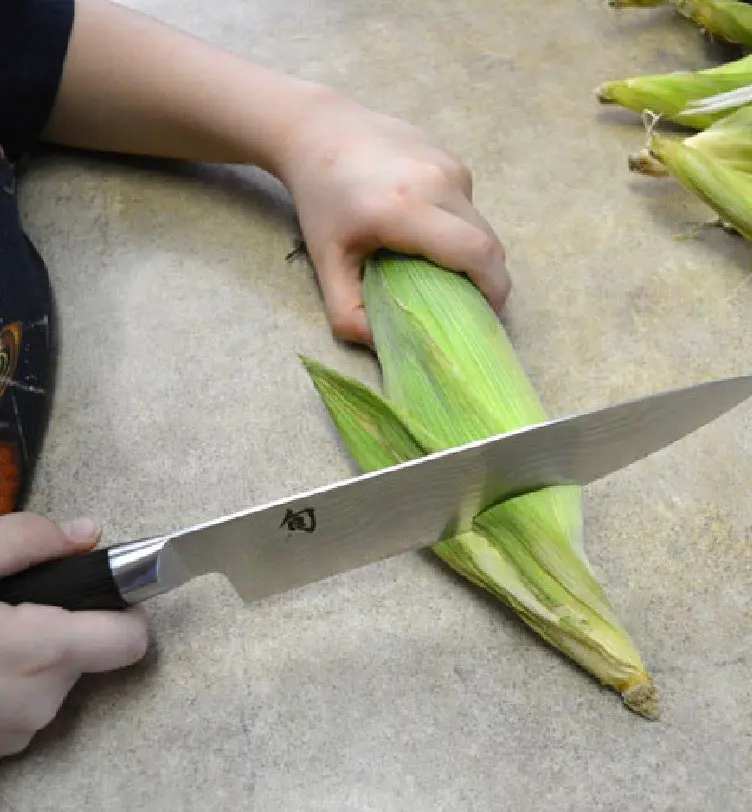
Grab the ear firmly and twist it downward, and using a sharp knife or pruning shears, cut the corn from the stalk, leaving a small portion of the stalk attached to the ear. Be gentle to avoid bruising or damaging the kernels. Place the harvested ears in a basket or container with a soft cloth.
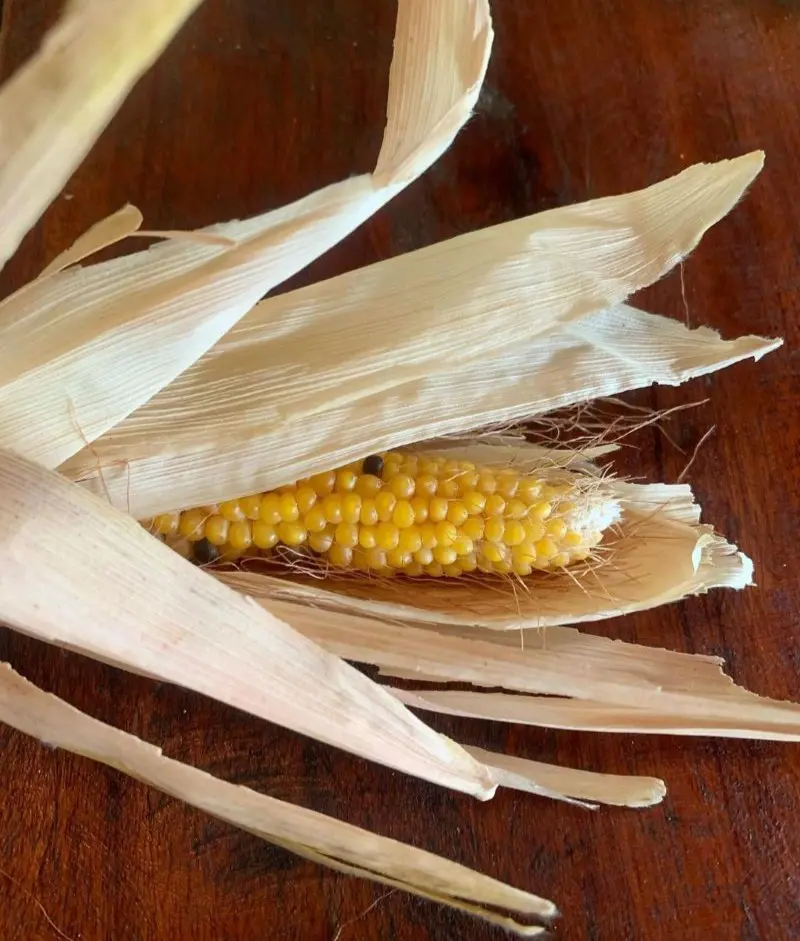
2. Removing the Husk
To remove the husk from the corn, grab the outermost layer of the husk near the base of the ear. Pull down firmly to peel away the layers, working your way down towards the base of the ear. As you peel, you will encounter the silky threads, or corn silk, which can be gently pulled off.
Remove all the silk strands to avoid any remaining fibers clinging to the kernels. If the husk is particularly stubborn or dry, you might need more force or break it into smaller sections. This process exposes the kernels and prepares them for drying.
3. Blanching
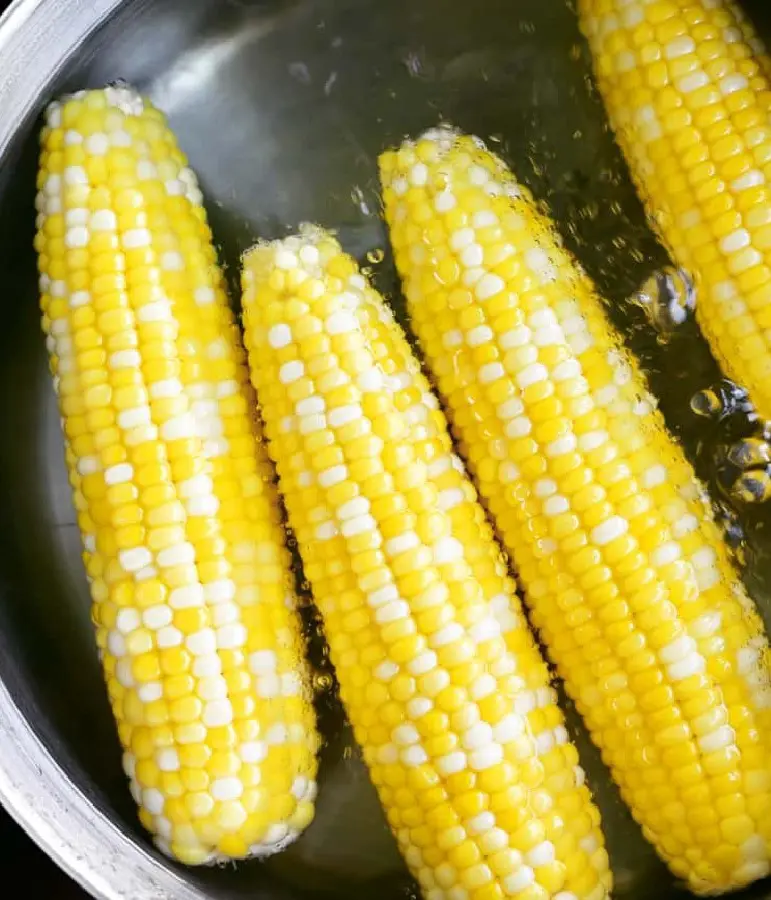
Blanching helps preserve the flavor, color, and texture of corn before drying. Bring a large pot of water to a rolling boil and submerge the corn in the boiling water for 2-3 minutes.
After that, remove the corn using a tong and transfer it immediately to an ice bath to lock in the natural sweetness and stop the cooking process. Allow the corn to cool down for 10-15 minutes. Remove the corn cobs from the ice bath and drain them thoroughly.
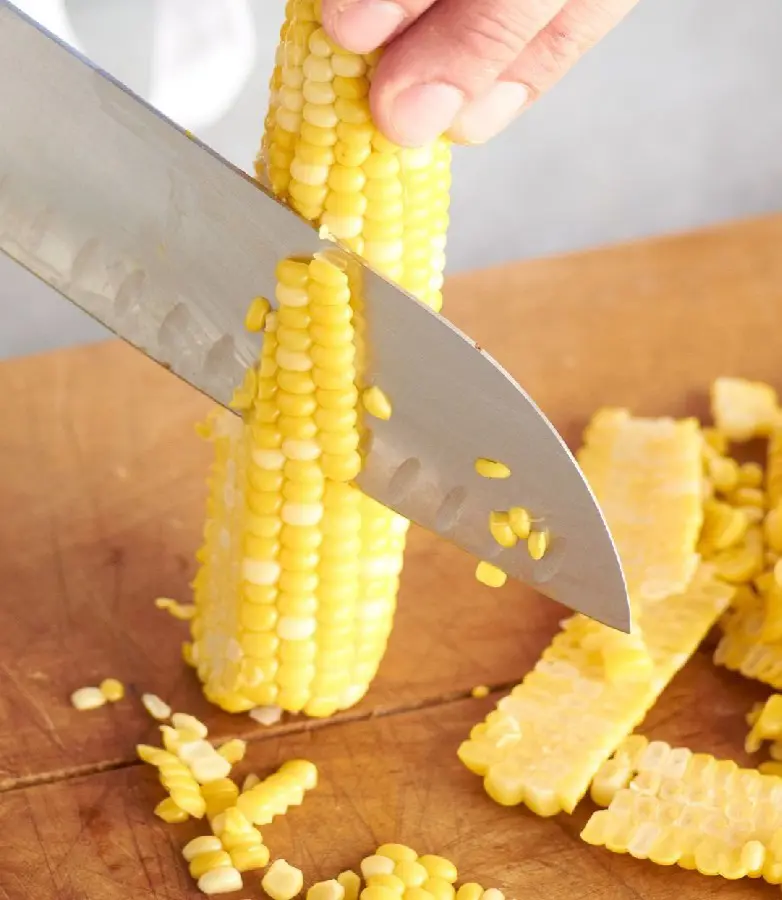
4. Cut Kernels
Once the corn has cooled, cut the kernel from the cob. With one hand, grip the corn cob firmly with the rounded end up. With your other hand, hold a knife with the blade facing down. Start cutting from the top of the cob, pressing the knife gently but firmly down the sides.
Try to cut through the kernels without going too deep into the cob. Angle the knife slightly downward to help remove the kernels cleanly. Avoid cutting too deeply to keep the fibrous part of the cob out of your dried corn. Continue cutting until you reach the bottom of the cob.
5. Drying
Once your corn kernels are cooled, they are ready to be dried. You can dry them using a dehydrator or oven. But regardless of the method you choose, the corn kernels must be completely dry. If not, it can lead to mold growth and spoilage.
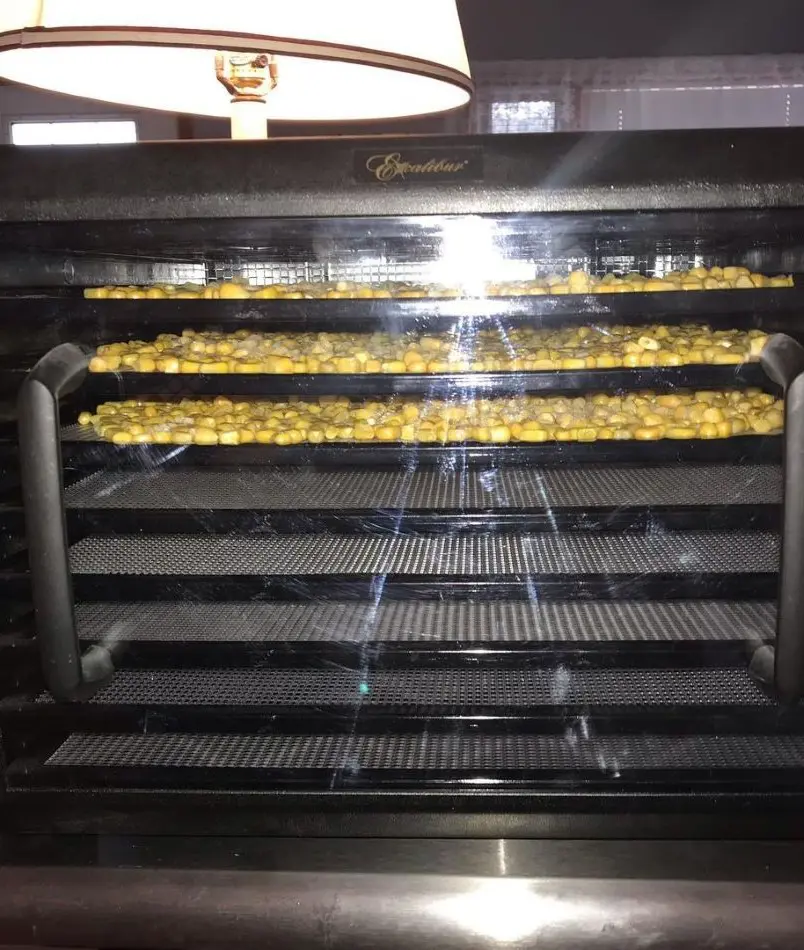
Dehydrator Drying
- Turn on your dehydrator and preheat it to 130-140°F (54-60°C).
- Lay out the dehydrator trays and cover them evenly with the corn kernels.
- Avoid overcrowding the trays, as this can slow the drying process and increase the risk of mold.
- The exact drying time typically takes 6-10 hours, but this depends on the dehydrator and the humidity levels.
- Every few hours, check the corn kernels for dryness. They should be crisp and brittle when ready.
- Maintaining a consistent temperature and good airflow is crucial for effective drying. Ensure the dehydrator is in a well-ventilated area.
Oven Drying
- Set your oven to the lowest temperature of around 130°F (54°C).
- Place oven racks covered with parchment paper inside the oven.
- Spread the corn kernels evenly on the prepared racks. Avoid overcrowding.
- Prop the oven door open slightly to allow moisture to escape.
- Drying time takes anywhere from 12 to 24 hours, depending on the thickness of the kernels and the humidity level.
- Check the corn every few hours for dryness. Rotate the trays to ensure even drying.
- Maintain a low temperature throughout the drying process to prevent the corn from cooking instead of drying.
6. Check for Dryness
The corns need to dry completely before storage, as even a trace amount of moisture can lead to mold. Therefore, determining when your corn kernels are sufficiently dry is crucial. Here is how to check:
Break Test
Carefully select a corn kernel from the dehydrator tray. Use your fingers to break the kernel in half. Apply gentle pressure at first, gradually increasing the force. The kernel is sufficiently dry if it snaps cleanly in two, with no resistance or bending.
The two halves should be crisp and brittle. If the kernel bends or resists breaking, it contains moisture. Return it to the dehydrator for further drying.
Moisture Test
For the moisture test, take a single kernel from the dehydrator and crush it between your thumb and forefinger. If the kernel crumbles into a fine powder, it is dry enough. As you crush the kernel, listen for a crisp, cracking sound.
If you are still unsure, you can also use a moisture meter to get a more accurate reading of the moisture content in your corn kernels, but this is not necessary for home cooks.
Visual Inspection
Dried kernels have a distinct appearance. Dry corn kernels will appear shrunken and leathery. The color should be consistent with the variety of corn you used.
There should be no signs of mold or discoloration. There should be no visible signs of moisture, such as condensation or water droplets. Look for white or fuzzy patches, as this indicates mold.
How to Store Corn
After drying, you should know how to store corn. Properly storing corn is crucial for preserving the flavor and texture of your dried corn kernels. Here is a step-by-step guide:
Step 1: Cool Completely
Corn kernels still retain heat after drying. If stored while warm, the residual moisture can cause mold. After removing the corn kernels from the dehydrator or oven, spread them out in a single layer on a large, clean surface for maximum airflow and quicker cooling.
Allow the corn to cool completely to room temperature. This step may take several hours. Avoid leaving them in direct sunlight to prevent the corn from drying out further.
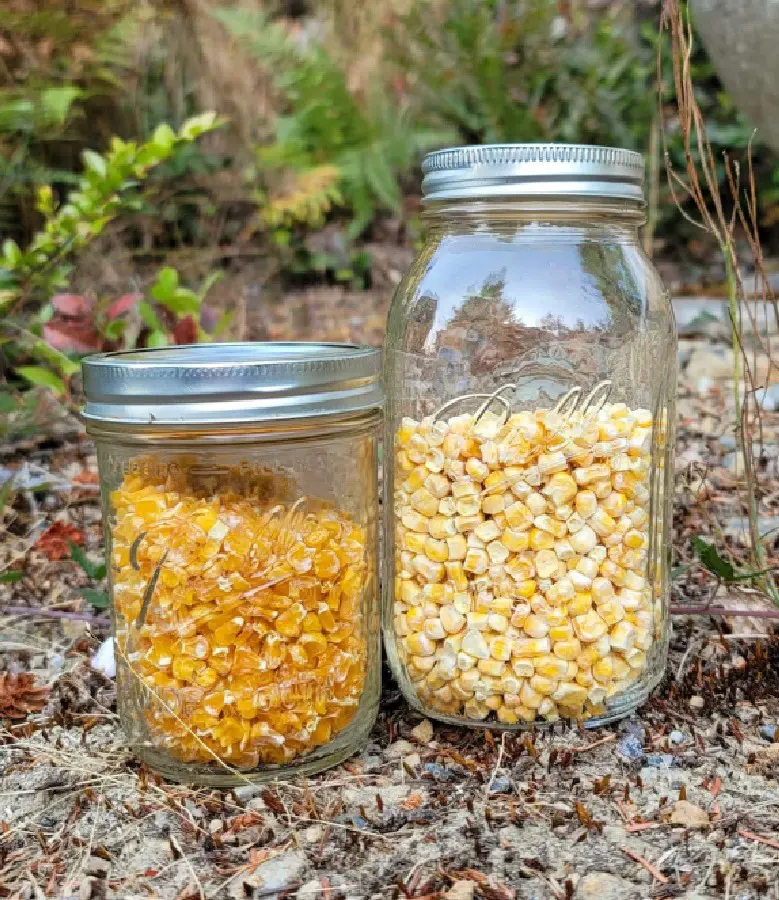
Step 2: Choose Your Container
There are many types of containers you can choose from. An Ideal option includes glass jars. They are airtight, odorless, and non-reactive, which helps maintain the corn's freshness. You can also use metal tins, but they might impart a metallic taste to the corn over time. Airtight plastic containers are also suitable but not as durable as glass or metal.
Choose containers that are the appropriate size, as overcrowding can lead to spoilage. The container should be thoroughly cleaned and dried before use to prevent contamination, and most importantly, it should have an airtight seal to protect the corn from moisture, air, and pests.
Step 3: Fill Containers
Once you have chosen your containers, pack the dried corn kernels into the containers, leaving minimal headspace to prevent air and moisture from coming into contact with the kernels and causing spoilage and mold.
Tips for Efficient Packing:
- Gently shake the container as you fill it to allow the kernels to settle and fill any gaps.
- Use a spoon or measuring cup to help you fill the container evenly.
- Avoid overpacking the container, as this can crush the kernels and affect their texture.
Step 4: Vacuum Bag
Alternatively, you can use a vacuum bag and a sealer to remove as much air from the containers as possible for a longer shelf life. This method is suitable when you have a large batch of corn kernels.
Frequently opening your container can introduce air and moisture and accelerate spoilage. Therefore, it is better to divide the kernels into smaller portions and store them in a vacuum bag.
Step 5: Label and Date
Label the containers with the contents and the date of packaging. This step is essential to prevent confusion, especially when dealing with a large batch of dried kernels. By dating the containers, you can determine which batch of corn was stored first.
This practice helps maintain the "first-in, first-out" principle, ensuring you use older corn before newer batches. The storage dates also help monitor the corn's quality over time.
Step 6: Storage Location
The ideal storage location for dried corn kernels is a place that has temperatures between 50°F to 60°F (10°C to 15°C) and is away from heat sources like ovens, radiators, or direct sunlight.
The storage location should be dark, as light can cause the corn to lose its flavor and color. Consider using opaque containers if your storage area is exposed to light. Common storage locations include a pantry, kitchen cabinet, basement, and garage.
How to Dry Corn on the Cob
If you want to learn how to dry corn on the cob, these are the steps:
Step 1: Harvest
Harvest your corn at the right time to ensure optimal drying results. Look for cobs where the kernels are fully plump and firm, indicating they have reached their peak. The husks should be brown and dry, not green, as green husks suggest the corn is still developing.
If you are harvesting from your garden, pull back the husks to inspect the kernels. If they are well-formed and the cob feels heavy, it is ready to be picked. Remove the cobs carefully, ensuring you do not damage the kernels.
Step 2: Blanch
Once you have selected your corn cobs, it needs to be blanched. Blanching halts the enzyme activity that can degrade flavor and texture during storage. Bring a large pot of water to a boil. Carefully submerge the cleaned corn cobs fully into the boiling water.
Blanch the cobs for 2-3 minutes, enough to inactivate enzymes without cooking the corn. After blanching, cool the cobs rapidly to prevent overcooking by transferring them immediately to an ice bath. This cooling stops the cooking process and helps preserve the corn’s quality.
Step 3: Dry
After the corn cobs have cooled down, pat dry them thoroughly with a towel to remove excess moisture and prevent mold during drying. Place the cobs in a dehydrator or the oven. If using a dehydrator, set it to 125°F (52°C) and space the corns to allow air circulation.
For oven drying, set the lowest possible temperature and prop the door open slightly to let moisture escape. Drying takes 8 to 12 hours, depending on the method and corn's moisture content. Check periodically to ensure even drying and avoid over-drying, which can lead to overly brittle kernels.
Step 4: Check
Regularly check the kernels for dryness to ensure your corn is adequately dried. After the initial drying period, remove a cob and break a kernel with your fingers.
It should snap cleanly and without resistance; if it bends or feels soft and pliable, it needs more drying. Properly dried kernels will have a hard texture and should not retain any moisture. Continue drying until all kernels meet these criteria.
Step 5: Store
After drying, let the corn cool down completely. Then, store the cooled corn in airtight containers like glass jars, plastic bins, or vacuum-sealed bags. Ensure the containers are clean and dry to prevent moisture buildup.
Place the containers in a dark location with low humidity and temperatures between 50-70°F (10-21°C). Avoid areas with fluctuating temperatures or high moisture levels. Check the stored corn periodically for signs of mold or moisture. If you notice any issues, re-dry the corn and transfer it to a new container if necessary.
How to Freeze Corn
Apart from drying, freezing is another way to store corn and preserve its freshness. This method is ideal if you live in regions with cold climates where oven and dehydrator drying seems ineffective. Therefore, you need to know how to freeze corn. Below are all the steps for freezing corn:
Select Corn
Unlike brown husked corn suitable for drying, freezing requires green husked corn. Green husks preserve their moisture and sweetness, which result in plump, juicy kernels ideal for freezing. These corns will retain their flavor and texture well during freezing.
Shuck the Corn
Once you have your corn, remove the husks and the silk by peeling from the top to the base of the cob and stripping them away along with the attached silk strands. You can use a vegetable brush or your hands to remove any remaining silk.
Blanching
We have already discussed how to blanch the corns above. This step is crucial to stop enzyme activity that causes loss of flavor, color, and texture over time.
Even when frozen, these enzymes can remain active unless deactivated by blanching. It also helps set the color of the corn and maintain its crisp texture when thawed. If there are any difficult-to-remove husks left, blanching can rectify that.
Cutting Kernels
Hold the cooled cob upright and, using a sharp knife, cut the kernels off the cob by slicing downward. Avoid cutting too deep to keep the tough cob out of the kernels.
Packaging
Spread the kernels in a single layer on a baking sheet and place them in the freezer for about 1-2 hours until they are firm. Then, transfer the frozen kernels to airtight freezer bags or containers, removing as much air as possible to prevent freezer burn.
Label and Store
Label the bags or containers with the date and store them in the freezer. Frozen corn can last up to 12 months.
Signs of Spoilage
Even if you dry and store your corn properly it can go bad. Here are signs to look for:
Mold
Mold is a clear sign that dried corn has gone bad. It can appear as white, green, or black spots on the kernels. Mold growth occurs when dried corn is exposed to moisture, creating an environment conducive to mold spores. This spoilage affects the corn's appearance and poses health risks if consumed.
If mold is present, discard the affected corn immediately. Clean and sanitize containers or storage areas where the molded corn was kept to prevent mold from affecting future stored food.
Off-Smell
An off smell is another indication of spoilage. Fresh dried corn should have a mild, slightly sweet, and neutral scent. The natural aroma is subtle and clean. If you notice a musty, sour, or rancid odor, it is likely due to mold growth or bacterial contamination.
This unpleasant smell results from moisture exposure, improper storage, or prolonged storage time. Inhaling this off smell is a clear warning that the corn is no longer safe to consume and should be discarded to prevent potential health risks from eating spoiled food.
Discoloration
Freshly dried corn should maintain a consistent, vibrant color. Properly dried and stored corn should look uniform and appealing. If you notice unusual darkening, uneven patches, or a faded appearance, it indicates that the corn has likely degraded.
This could result from exposure to moisture, light, or air, which can lead to spoilage. If discoloration is evident, discard the affected corn, as accidental consumption could cause nausea, indigestion, cramping, and possibly diarrhea.
Texture Changes
If the corn feels unusually soft or sticky, it may have absorbed moisture, leading to mold growth or bacterial contamination. Conversely, if the corn is excessively hard and brittle, it might be overly dried or past its prime.
Both conditions suggest that the corn is no longer fit for consumption. Properly dried corn should be firm and dry but not overly tough. Monitoring these texture changes helps ensure corn remains safe and maintains its quality.
Insects or Pests
The presence of insects, webs, or holes in the corn kernels is a clear sign of infestation and spoilage. If you notice bugs, larvae, or webbing on or around the corn, it indicates an infestation. These pests can cause damage to the kernels, leading to spoilage and potential health risks.
Additionally, their presence suggests that the corn may have been exposed to moisture, making it a more inviting environment for pests. To prevent this, ensure the corn is stored properly and regularly check for signs of infestation.
Taste
A taste test should be the final check for spoilage. Spoilt corn tastes off or rancid, while fresh dried corn should have a pleasant, sweet, or neutral flavor. If you notice a sour, musty, or unusual taste, this indicates that the corn has deteriorated. Consuming spoiled dried corn is unpleasant and potentially unsafe.